Masala—Construction—7 |


|
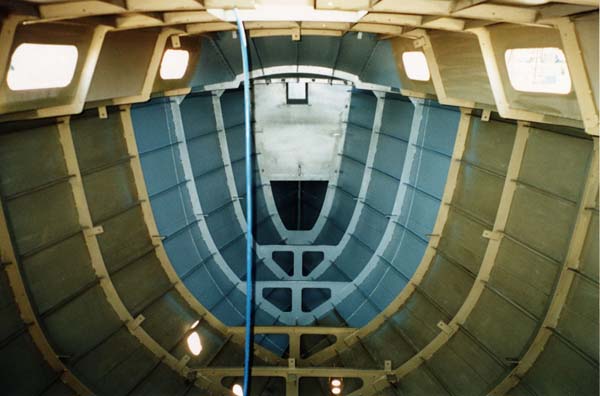
33. INTERIOR PAINTING—1 Above: this photo shows the forward part of the interior and the collision bulkhead / anchor locker plate. The removable plate that seals off the entire bow section is not fitted yet as painting and foaming has not been completed. The whole interior has already been sprayed with two-pack epoxy Sigma EP Universal Primer (khaki-green). Spraying of the second coat, blue two-pack epoxy Sigmacover TCP Coating, has commenced. After each coat has been sprayed, it is necessary to go around with a brush and paint all areas where the spray did not reach, for example, under all the stringers next to the frames. |
|
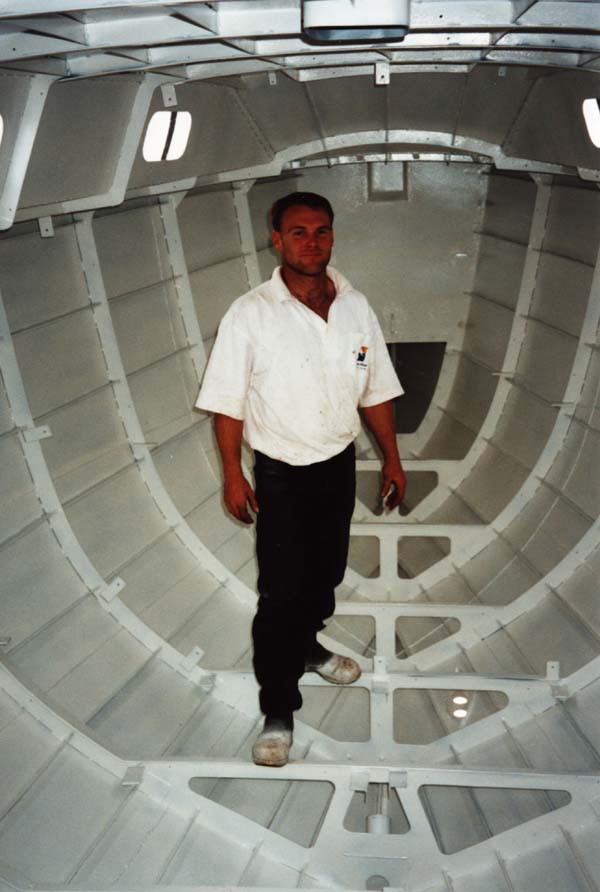
34. INTERIOR PAINTING—2 Above: the third coat, white Sigmacover TCP Coating, is on. But the interior painting is not yet finished. After the foam insulation is sprayed in, the remaining exposed bilge area will be sprayed with a fourth coat, white Paracryl IFC, to give a glossier and easier to clean finish to the bilges. |
|
After painting and before the foam insulation is blown in, all the frames and stringers are sealed to the plates with Sikaflex. This prevents any moisture from collecting and causing corrosion. Each stringer has a limber hole at one end, against a frame, and the lowest point of each frame in the bilge also has a limber hole. This, combined with the Sikaflex sealant, forces any water that does get inside the boat to flow along a stringer to its limber hole, then down through all the other stringer limber holes to the bilge, then through the bilge limber holes in the frames to the deep well where it collects and is pumped out by two electric bilge pumps. The job has been beautifully done and, combined with the high quality interior paintwork, should ensure that Masala is highly resistant to rusting from the inside out, a problem that is all too common in steel vessels. |
|
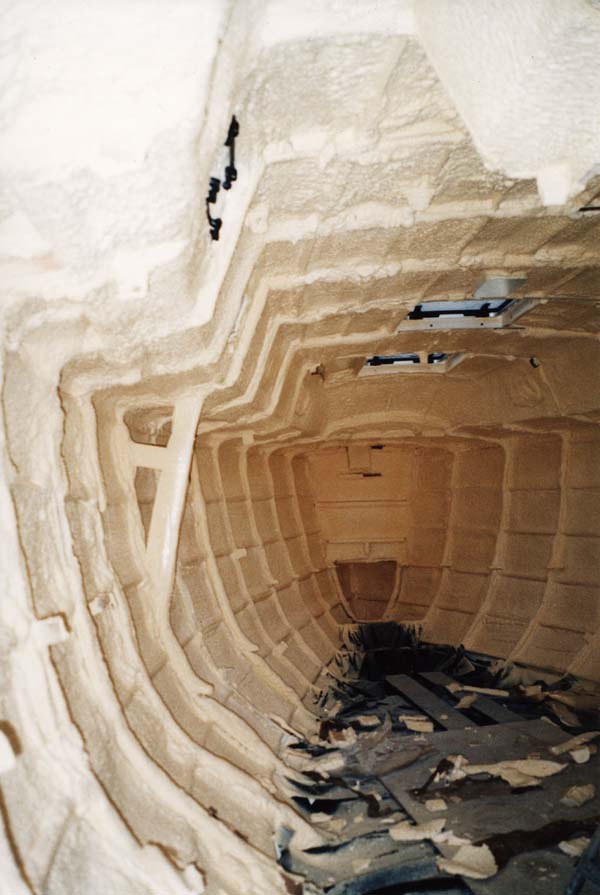
35. BLOWING IN THE FOAM Left: this involves three tedious processes. First, all frames were taped to stop the foam from sticking to them. Then the foam was blown in. Finally, the solidified foam was pared back to a smooth finish to enable the interior lining to be installed. Eight large garbage bags of scraps were removed. Now that painting and foaming is completed, installation of the interior can begin. |
|
36. INSTALLING THE TANKS The stainless steel fuel and water tanks, having been fitted earlier then removed prior to painting (right), are now reinstalled. |
|
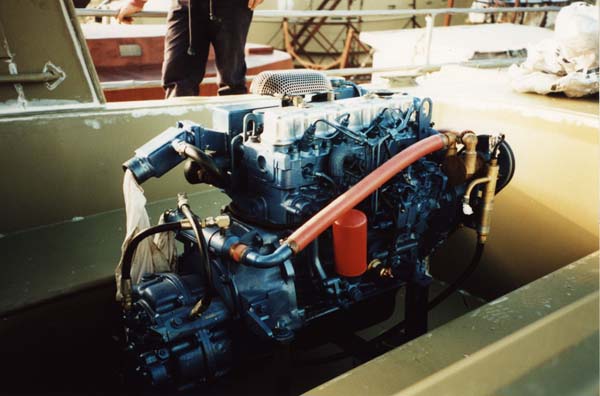
37. INSTALLING THE ENGINE Below: the Nissan-Diecon SD25 60 horsepower diesel engine sits in the cockpit ready for craning into the engine bay. |